Urus Este Cordillera Blanca Peru

Urus Este 17782ft Grade: PD

Urus Este 17782 ft (viewed from high on Ischinca) 
Grade: PD

Last year Independence day was spent climbing Mt Rainier.  I would spend the second 4th of July in a row climbing a mountain.  The goal today was to climb 17,782 ft Urus Este.  This peak is considered easy by Cordillera Blanca standards, but in comparison with the mountains in my resume, it is a big mountain.  Continue reading

Cordillera Blanca – Peru Skills Seminar with RMI

“Anything in life worth doing is worth overdoing, moderation is for cowards”

I am struck by this quote from the movie Lone Survivor, which I am watching on my iphone as I travel by bus to the city of Huaraz.  I have certainly sacrificed, and worked hard to be here.  For the last eight months much of my free time has been spent on training, and this trip has lightened my wallet considerably.  The level of climbing these mountains demand certainly entails more risks than I have previously been exposed to.   Whether I am living a balanced life or overdoing it I’m not sure, but one thing is certain, I am happy to be here.  I am tingling with anticipation for the adventure that awaits me.  I am headed into the Cordillera Blanca, one of the highest and most rugged mountain ranges in the world.  This area has a special combination of  interesting culture, great conditions, insane beauty, and wild routes that make it a mecca for alpinism.

Continue reading

Polar Star Inn (Hut Trip 2014)

In many states a winter hut trip would involve heading to pizza hut for a mediocre slice of pepperoni pie.  In Colorado it consists of treking through snow to a warm and cushy cabin deep in the backcountry.

Last year a group of us made an easy trip back to Continental Divide Cabin.  Since everyone had a blast we decided to pick a different hut and repeat the trip.  This year the group agreed to up the challenge, and go for a more remote hut.  We settled on Polar Star Inn which is a 17 person hut in the 10th Mountain Division Hut system.   We also convinced more people to join us getting the group size up to 11.

Continue reading

Conundrum Hot Springs

Conundrum Hot Springs is a 100 degree pool  near Aspen Colorado, that is situated in a stunning alpine basin at 11,000 feet.   At the hot-springs you stare up at two 14,000 ft peaks (Castle and Conundrum) and a 13er Castlebra.

Our faithful backpacking partners Erik and Steph drove up from Albuquerque to hike back to the springs with us.  Our plan was to camp near the springs Friday and Saturday and climb a peak on Saturday morning.

Continue reading

Continental Divide Cabin MTB Trip

Some friends of ours who moved to Wisconsin a few years ago, invited us to join them for two nights in one of the 10th mtn division huts.  I have been wanting to check out these huts for some time so we jumped at the chance.  The 10th Mountain Huts are a network of 30 back-country huts. They are named after the light infantry division who trained at Camp Hale (near Leadville) during WWII.
Our hut (The Continental Divide Cabin)

Hut-trip_29

Continue reading

Lost Creek Wilderness (Refridgerator Gulch)

For me, the ache to spend a night out under the stars usually sets in as the days start to warm in April.  I begin to keep an eye on the mountains, and plan my first camping trip of the year.  A typical June in Colorado finds most of the high alpine backpacking destinations still burred under snow. With this in mind I decided my first trip would be to the lower altitude Lost Creek Wilderness.  This however, is not a typical year, and we were in for some hot days of hiking.
Ride_2Ride_3Ride_4Ride_6Ride_7Ride_9Ride_5Ride_1Ride_5Ride_2Ride_3Ride_4Ride_6

Lost Creek Wilderness is the closest wilderness area to my home in Castle Rock, Co.  It is popular for its multi-day loop hikes.  We were strongly considering doing the 26 mile loop from Goose Creek Trailhead.  However, this was our first backpack of the season, and severe blowdown in lake park promised to add miles and elevation to an already strenuous itinerary.  We decided the best choice was to do an out and back hike to refrigerator gulch.

Day One Goose Creek Trailhead -> Refrigerator Gulch

Friday morning I awoke at 5:30 ten minutes before my alarm went off.  Friends from Albuquerque spent the night, and we wanted to get an early start to beat the heat and the crouds.  We were on the road shortly after 6AM, it was around a 2 hour drive to the trail head.  A lot of that time is spent on well graded dirt roads. We parked at the Goose Creek Trailhead around 8:30 AM.  The traihead does not have any facilities, the closest toilet is at the Goose Creek Campground.  There were five or six cars parked in the parking lot.  After readying our gear we hoisted our packs (mine was 35lbs) , and hit the trail.

The first 1/2 mile or so of the trail travels through the burn scar left by Colorado’s largest wildfire.

457424_3353664035513_1481869906_o

Soon you enter the trees, and come to a well constructed bridge that crosses Goose Creek. Just before the bridge there is a trail to the left. We did not follow this trail, but It appears to lead to a nice campsite which you can see across the creek farther down the trail.  At approximately 1 mile in you will come across a few nice campsites along the creek. These sites are directly on the trail, and I would imagine there is a lot of traffic that close to the trailhead.

<insert pics and map showing sites>

In the next couple of miles we passed three solo hikers, they would be the only people we saw all day.  Around mile four we came to the intersection with the side trail that heads down to the “Shafthouse” area.  At this intersection there is a large campsite.  Again it is right on the Goose Creek Trail with little privacy. There is water available from a small stream (probably dries up mid summer).  We stashed our packs in the trees, and headed down the side trail to explore.  Man did it feel good to have the pack off!  A few hundred feet down the trail you come to some “historic” buildings.  The buildings are the bunkhouses used to house workers from Antero and Lost Park Reservoir Company. The company had a failed attempt to pump concrete into the boulders, in an attempt to construct an underground damn of Lost Creek.    If you take a right at the buildings you can head 1/2 mile by trail to the shaft-house area.  The remains of the pump are not particularly interesting. However, the rocks in reservoir gulch are awesome.  They are immense boulders that form a network of underground caves.  We had a blast exploring the caves, and especially enjoyed the break from the scorching sun!!  The Caves have some awesome lighting, we found a spot that had a beam of light that produced photos looking like you were being “beamed up”  (see pics below). The shafthouse area had 3-4 nice campsites.  However, Lost creek is underground here so you have to be willing to hike for your water.  If you get far enough up the gulch the creek re-emerges. However, it is some high class two low class three scrambling to get up there.

If you take a left at the historic buildings there is a trail that leads to a dozen nice campsites near lost creek.  The area is popular, and on Saturday night there was at least 6 parties camped there.  There is a particularly nice site right on the shores of Lost Creek, however, it is not legal as it is to close to the water.

South Colony Lakes and Humboldt

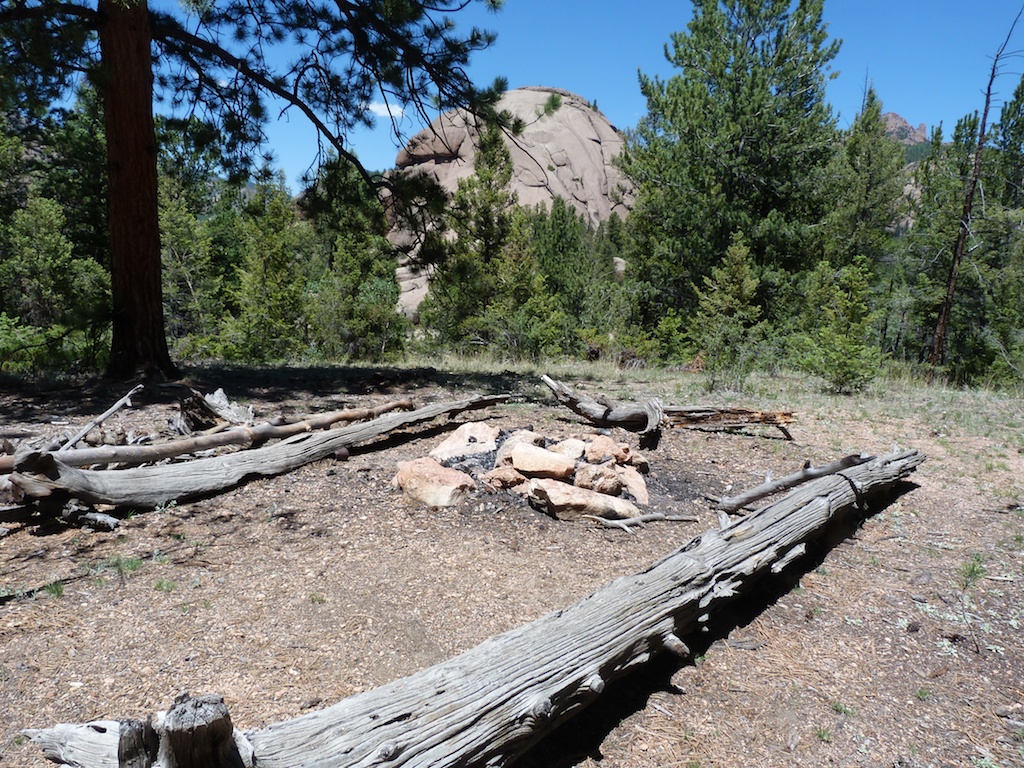
I elected to spend my 33rd birthday camping in the South Colony lakes area, and climbing the 14er Humboldt. We met up at the lower 2wd trailhead and made the bumpy but uneventful drive to the upper trailhead. The drive took about 20 minutes. We arrived at the upper trailhead around 10AM on Friday morning. We promptly deployed some mothballs (to ward off marmots / porcupines), and readied our packs. The upper trailhead has 3-4 nicely developed campsites. The sites have a flat tent platform and a steel fire ring with grates. There is one site that is maybe .10 of a mile down the trail just across the bridge. There are also at least a half dozen good dispersed sites along South Colony Road. At the trailhead there are no trash or toilet facilities. When we signed in at the register there was a poster saying that they were going to start charging a $20 fee for using the area in the near future so you may want to check the status of that before heading to the trailhead.

The hike up the old 4wd road was pretty easy we took our time and enjoyed the beautiful surroundings. At approximately two miles we hit the “shortcut trail’ that is marked as a pack trail on topo maps. There is a sign here although I think it is a bit misleading. The sign indicates that the trail leads to upper lakes / Humboldt. You can also use this to access the lower lakes and Crestone Needle.
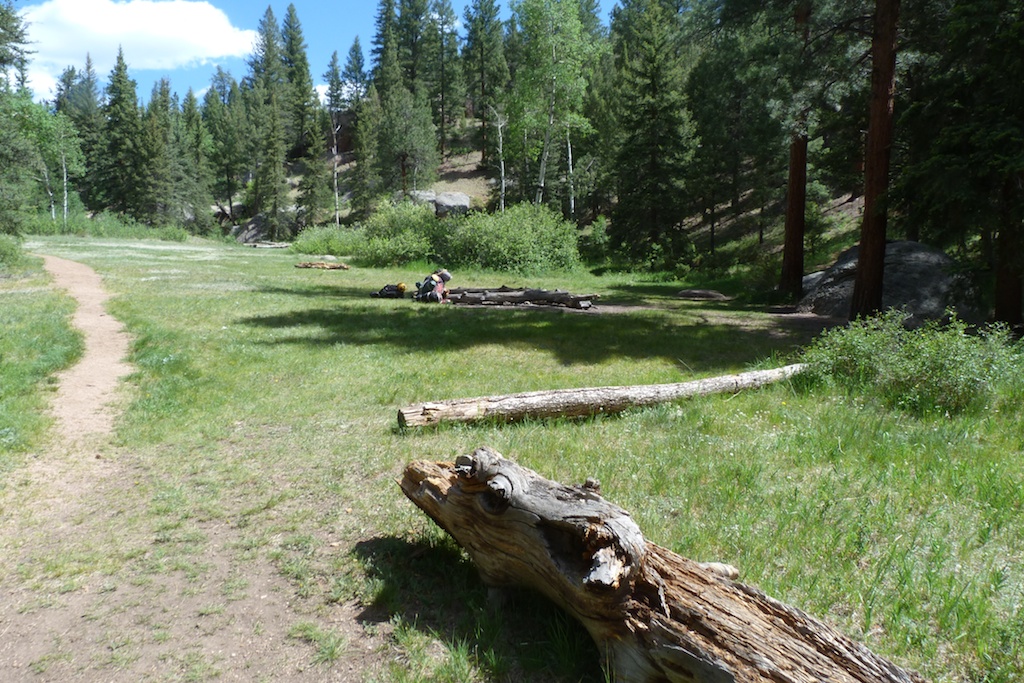
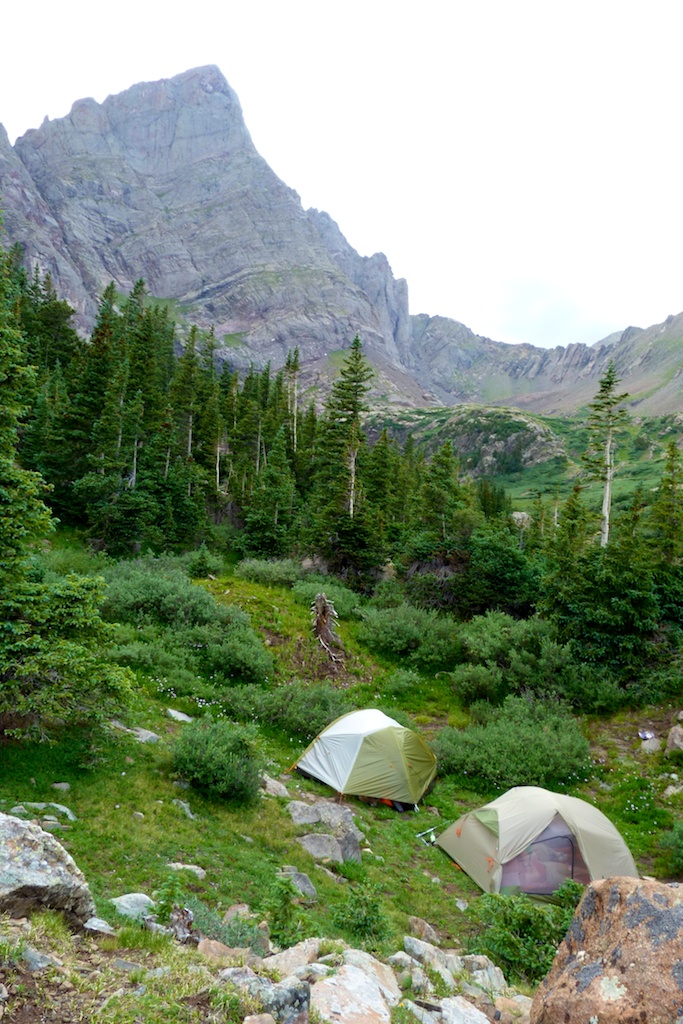
We started seeing campsites somewhere around 3 miles in we decided to keep hiking as we wanted to camp near the upper lakes. We hiked around and surveyed over a dozen good sites before settling on this one. We picked it because it was sheltered / private, yet had good views with access to water. There are a lot of good sites up there however; many of them almost have a campground feel as they are well developed and quite close together.

Campsite
Baby_bighorn

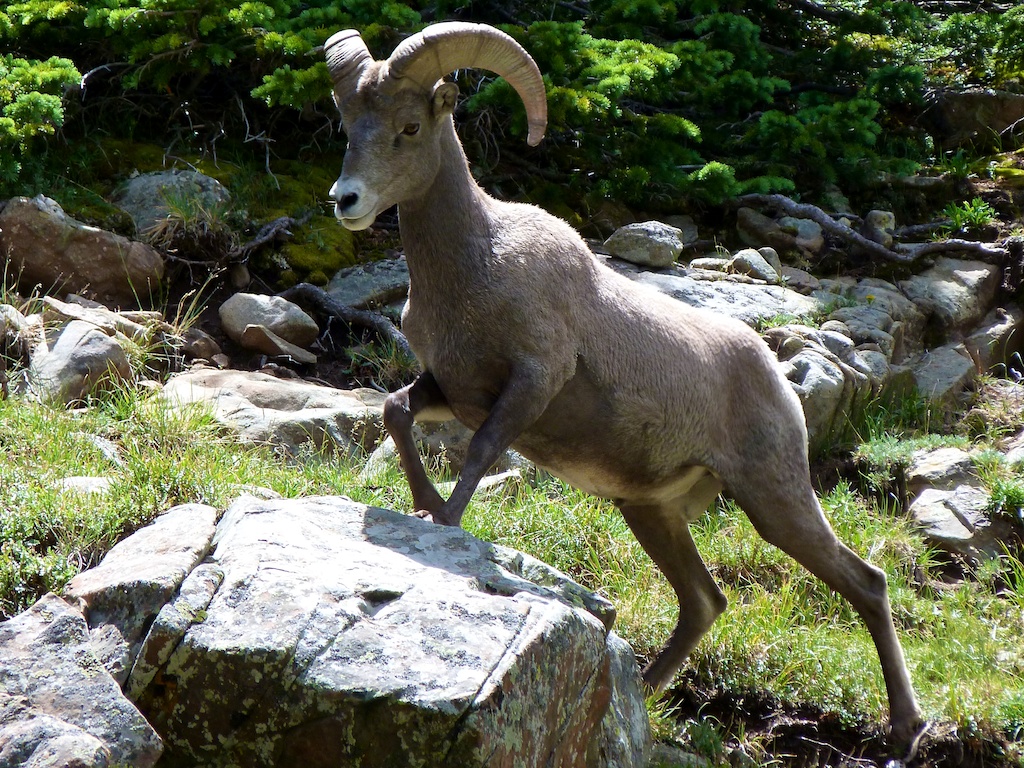
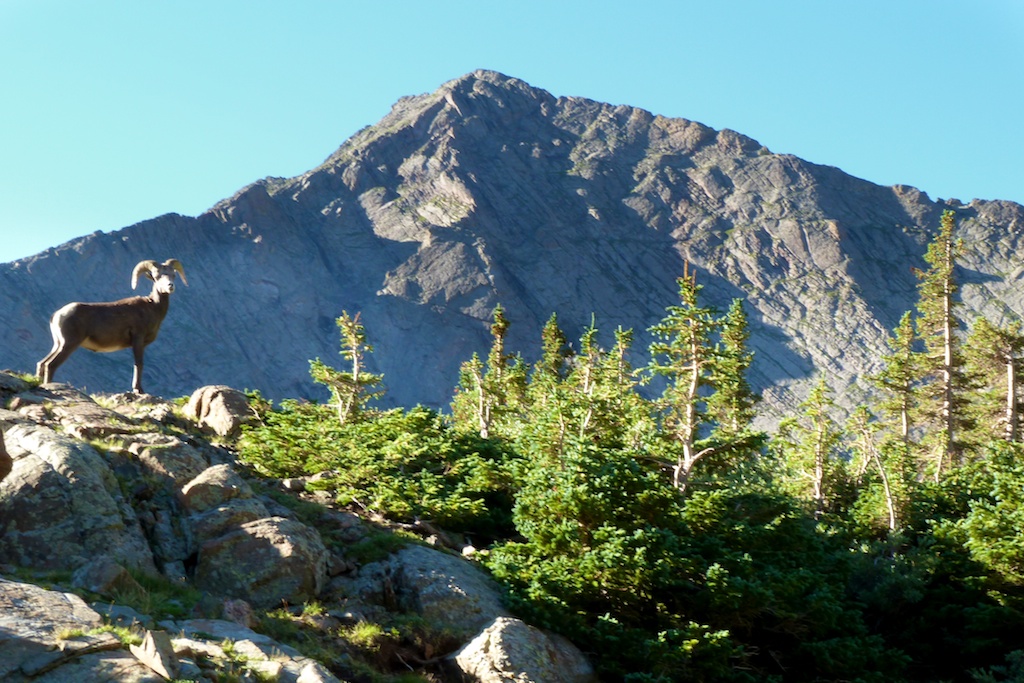
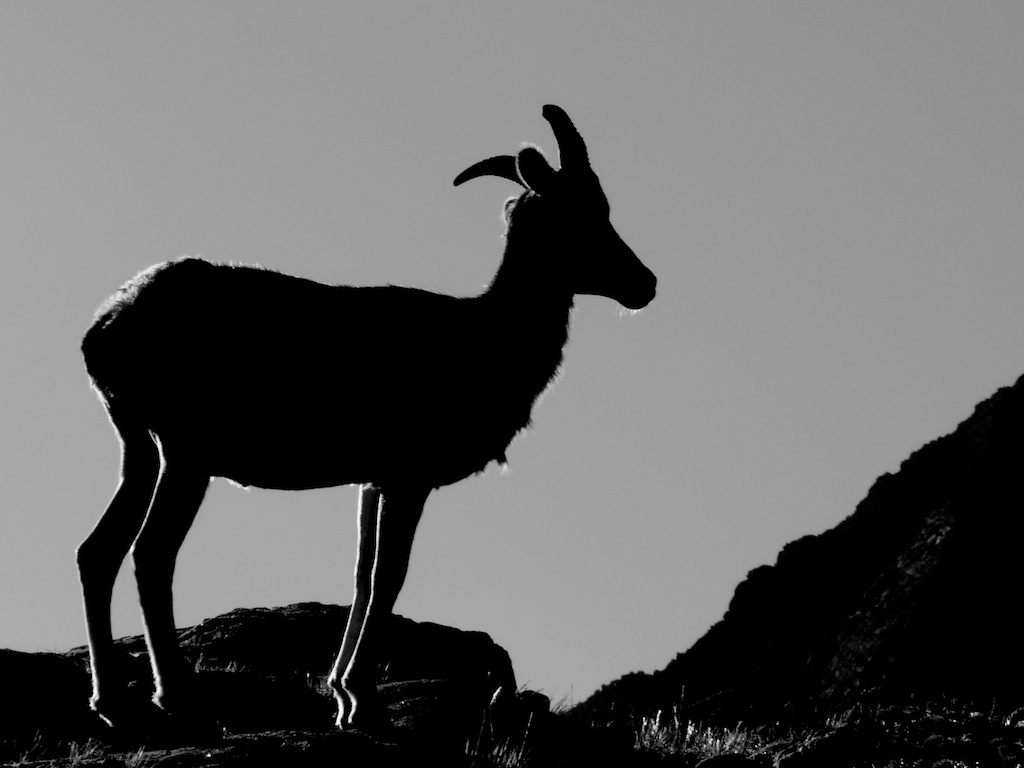
While hunting for a site I ran across a heard of bighorns including a baby. They were scavenging around someone’s campsite.

Big_horn_sheep

We spent the remainder of the afternoon lazing around camp. A couple of thunderstorms blew through in the afternoon. Wow they really move in quickly up there, and the needle blocks your view to the west where they come from. By the time you can see the clouds you have 15 minutes until it is over you.
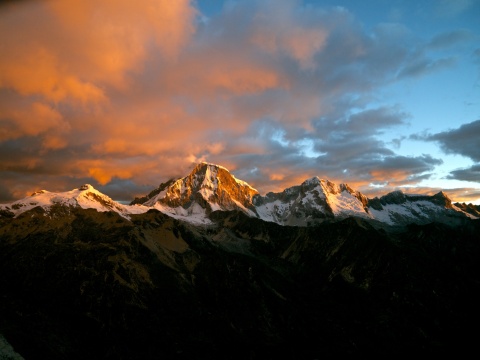
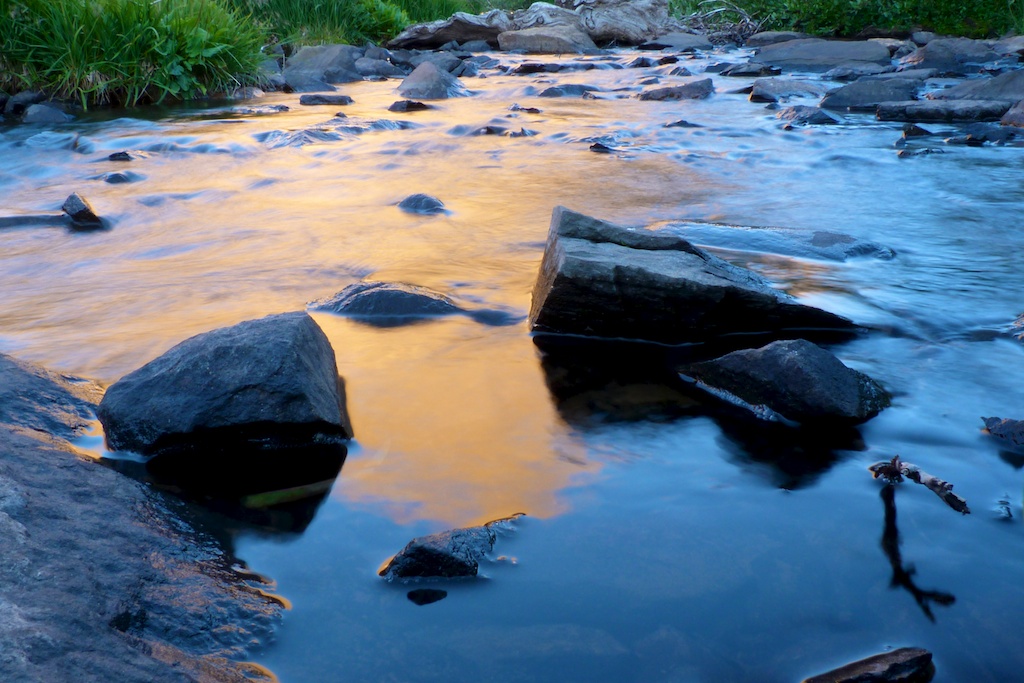
We turned in early so we could get good nights sleep. Although our camp was hidden from view of other campsites we could hear nearby campers enjoying campfire conversations. At 4:30 AM my slumber was rudely interrupted by the marimba sound emanating from my iphone. As I fumbled around in my tent pocket to snooze it, I could hear the wind blowing hard in the trees above us. We decided we would sleep for another half hour and see if the wind would die down. Reluctantly we extracted ourselves from the warm sleeping bag around 5AM. I went down by the creek and snapped couple of pictures of the Needle as the glow of the pre dawn sun warmed it.   

Crestone_needle_alpenglow

We hit the trail around 6AM. The wind had died down and it looked to be a near perfect day for hiking. I noticed the needle reflecting in the creek below the lower lake. The contrast was to high to get a good picture (this would be a great spot for an alpenglow shot)

Colony_creek

Soon we passed the upper lake and the trail steepened as it began to climb the saddle. As others have noted the CFI has really done nice job improving this trail. I can’t imagine how much work it took to place all those steps. On the way up the ridge we passed some nice wildflowers. They were a couple weeks past prime but still very pretty.

Hiking_up_humbolts_west_ridgeP1030973

We took our time enjoying the view from the trail. We reached the saddle and took a break around 7:20. We got our first views of North Colony lakes here. There was a little wind, but less than I expected.

Angela_with_humboldtSteph_surveys_kit_carson_and_north_colony_lakes

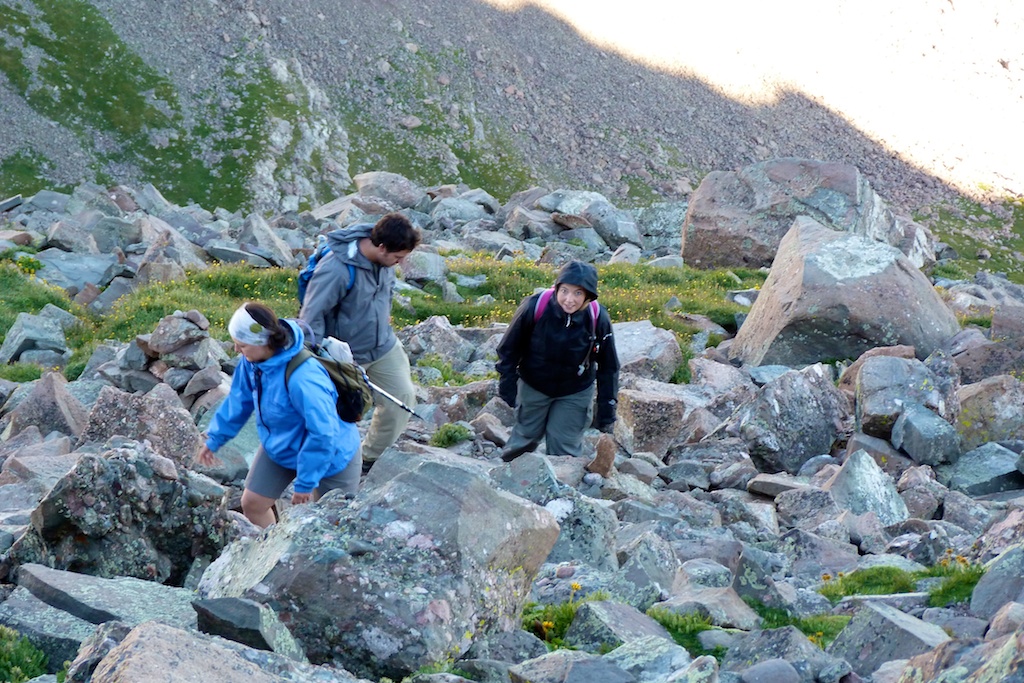
After leaving the ridge the trail gets even steeper and rougher. I stowed my trekking poles as they were just getting in the way at this point. The trail to the false summit soon turns into a fun scramble over a large boulder field. Really the only thing to be careful of here is the occasional loose rock. There are cairns marking a pretty easy route through the boulders, but there are endless options of class two routes. Really you just need to meet up with the ridge line on the other side of the false summit. Angela was somewhat freaked out by the scrambling and so we took quite a bit of time making it up to the ridge.

Picking_our_way_through_boulders

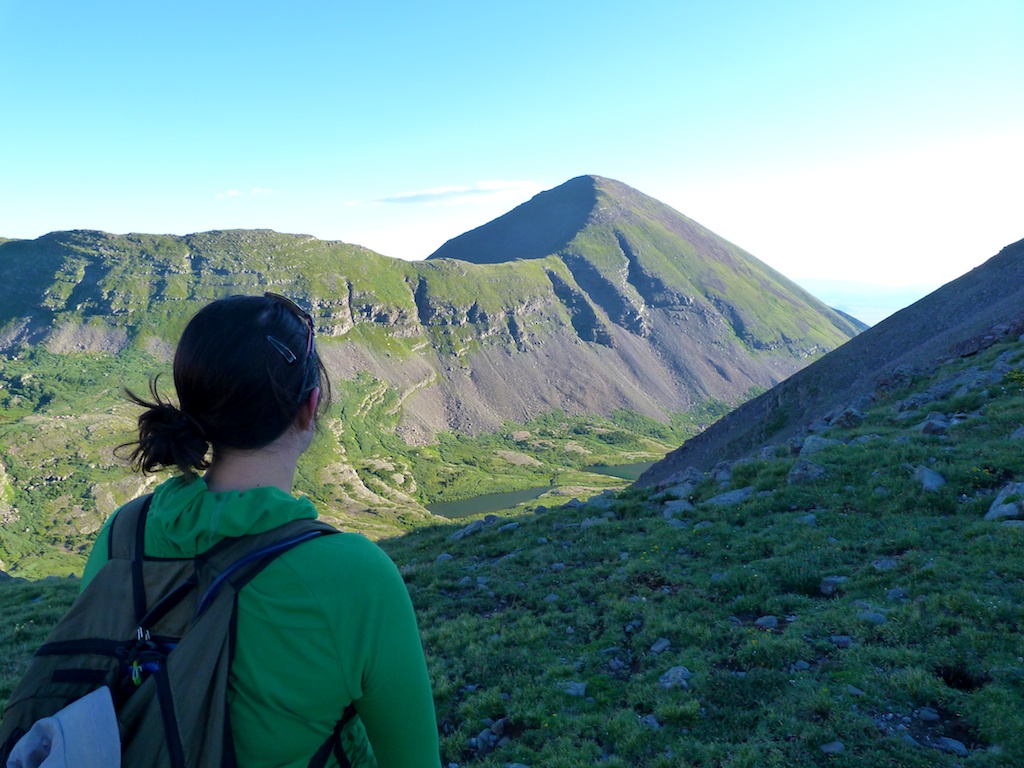
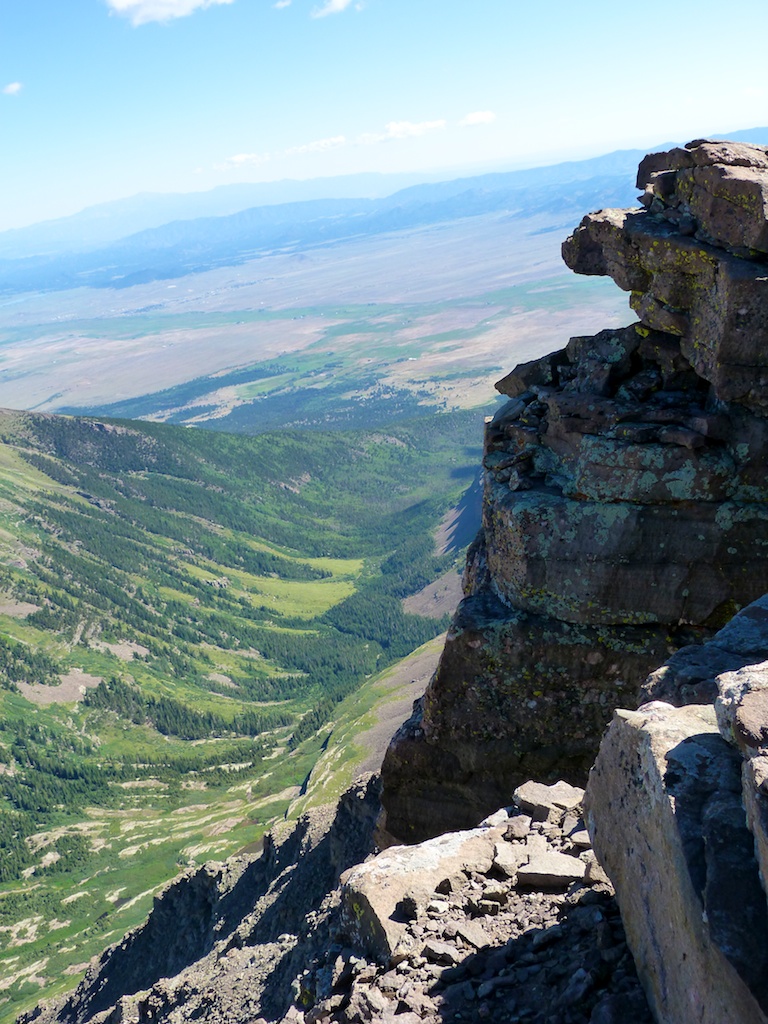
As we reached the home stretch we paused to get some pictures of Humboldt’s impressive north face. A group of four that passed us on the saddle stopped to say hi as they returned from the summit (We had only seen one other group all morning)

Keith_on_humboldt_north_faceP1040079

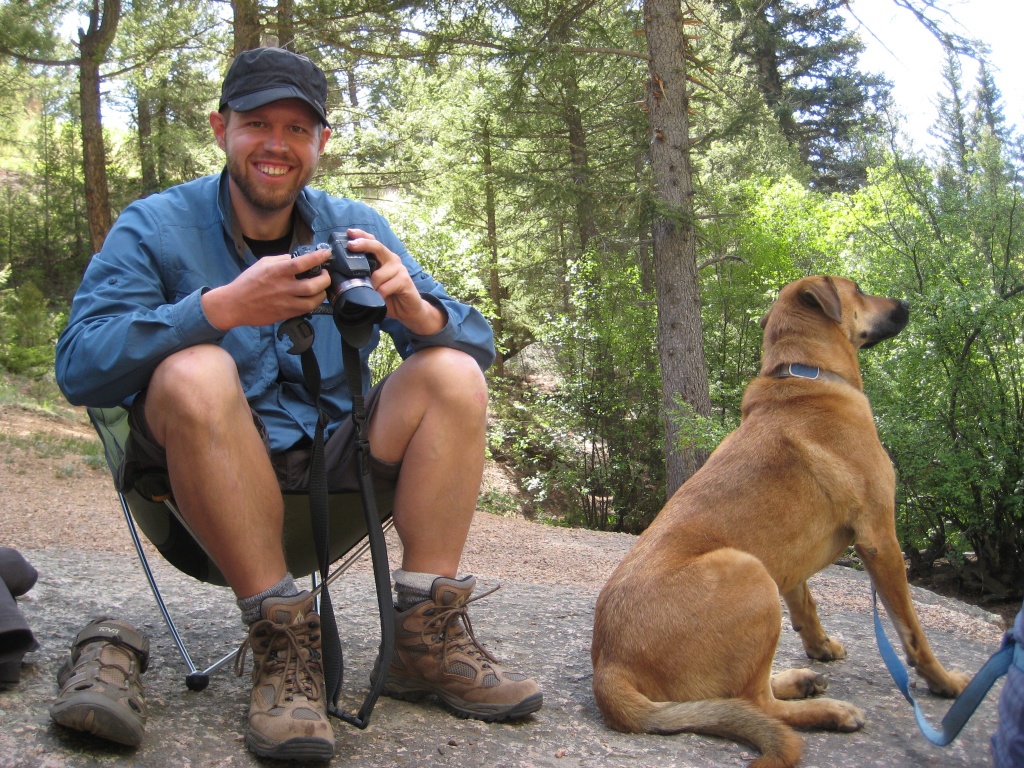
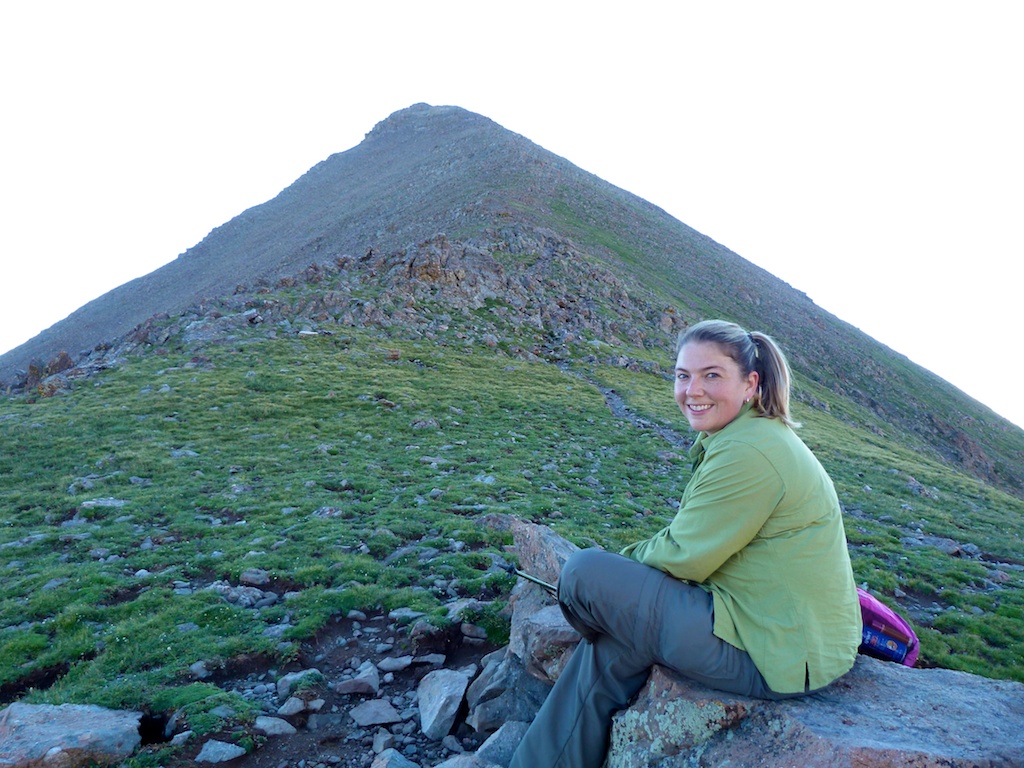
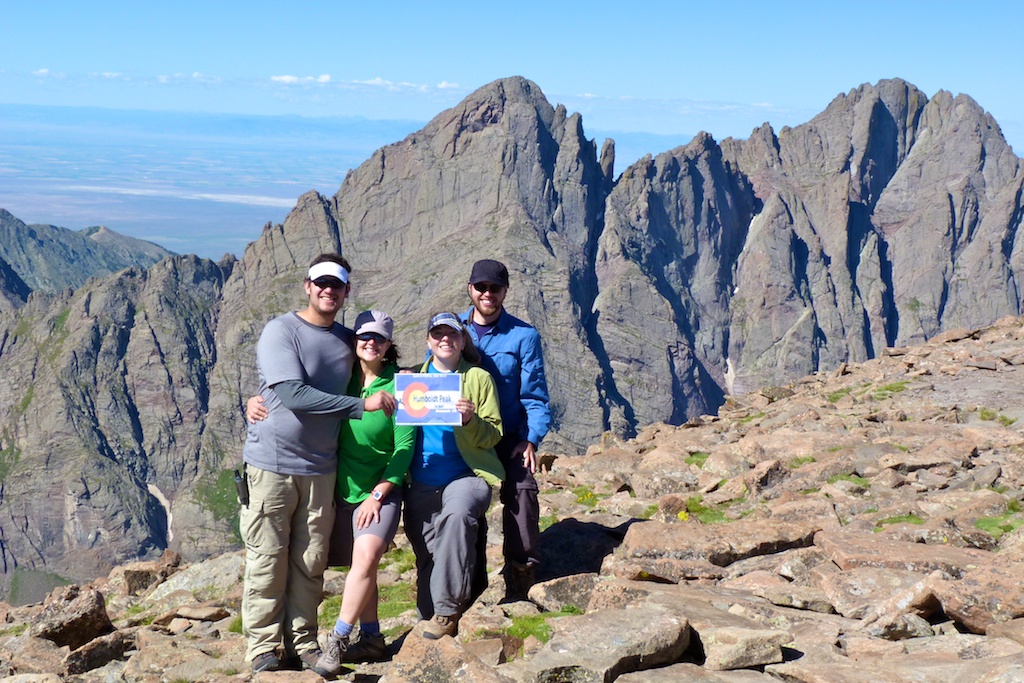
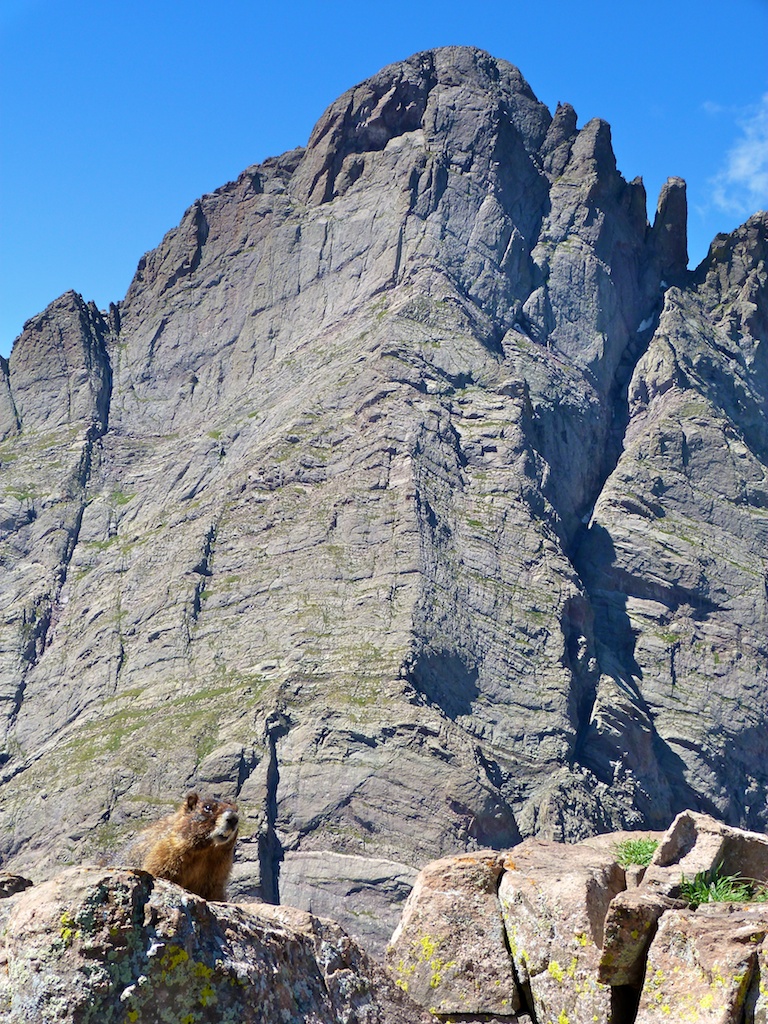
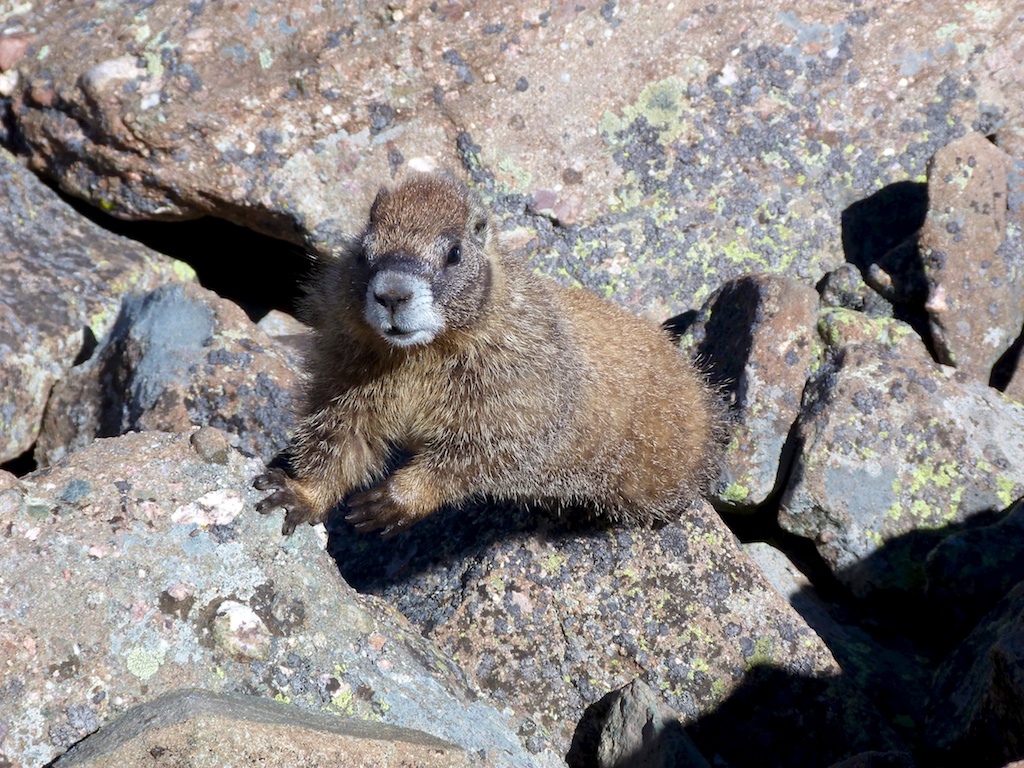
From the false summit there was a short scramble to the summit. The summit of Humboldt was quite large and had a nice wind shelter. The weather was PERFECT hardly any clouds and dead calm. We shared the summit with a few marmots and pika that came to help celebrate Erik & Steph’s first 14er summit.

P1040086Marmot_below_crestone_peakMarmotPika_on_summitP1040070

The return trip was relatively uneventful. We made good time although it seemed like a longer hike on the way out. We passed 3-4 more groups making their way up the trail

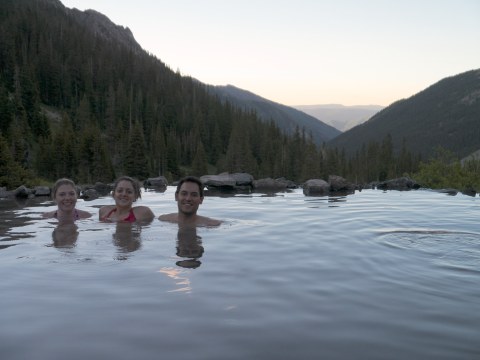
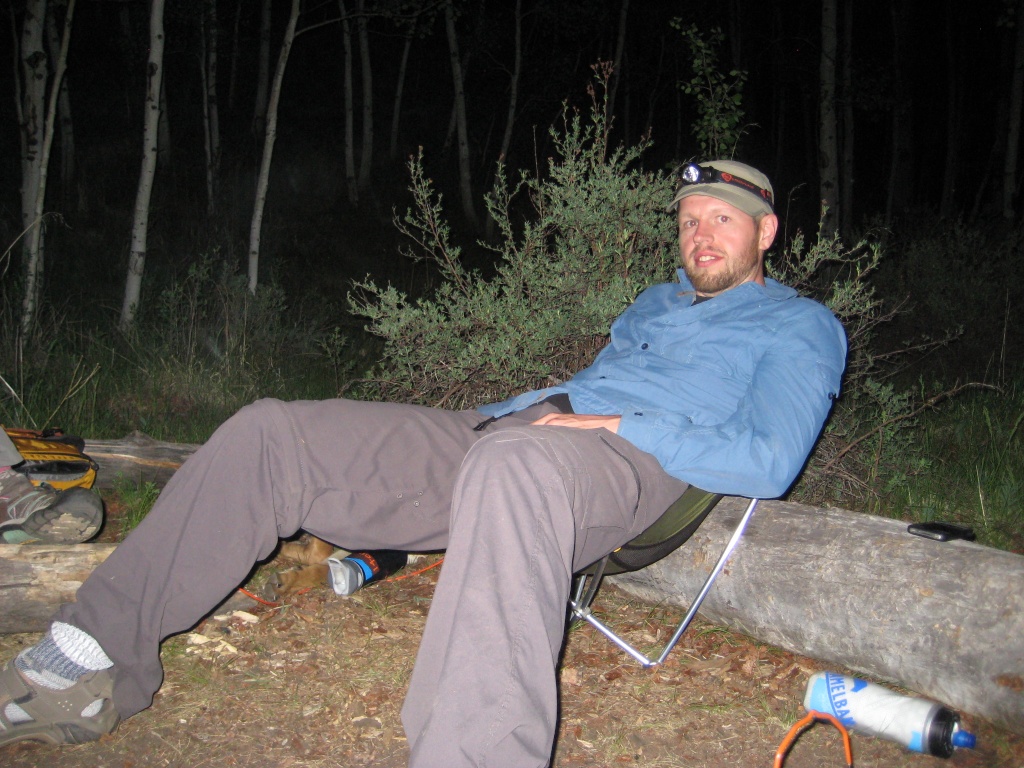
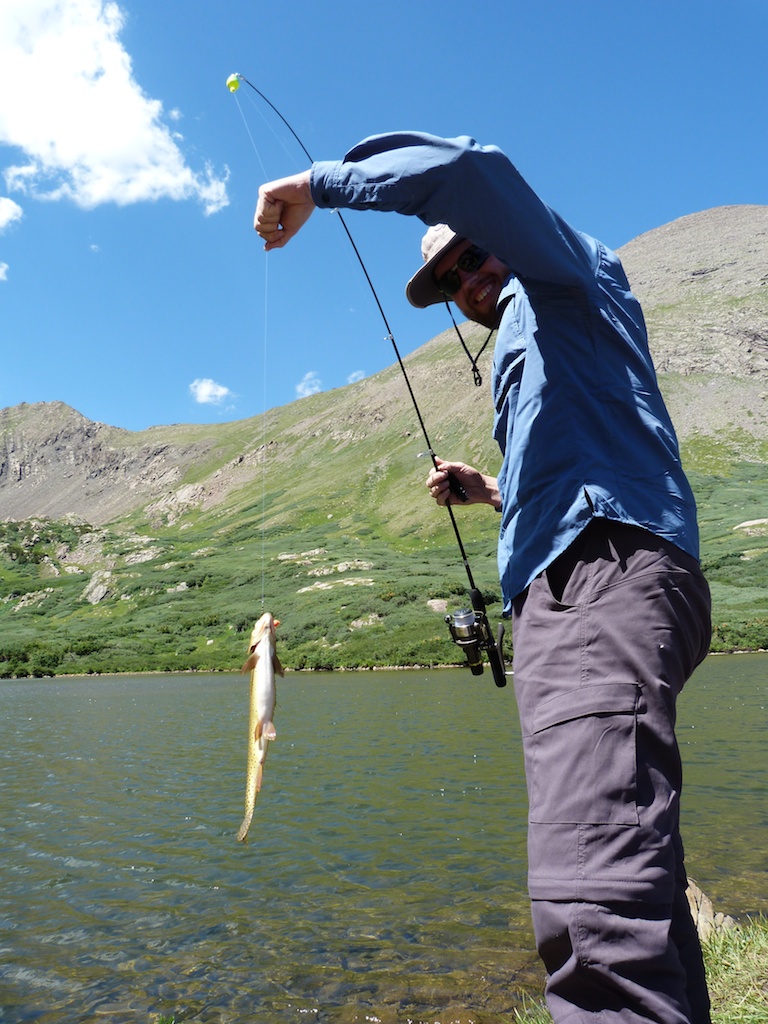
Upon reaching camp we traded in our hiking boots for sandals and headed up to the lake to eat lunch and fish. We enjoyed a lazy afternoon at the lake, and an evening around the campfire.

P1040118Small_cutthroat

There were fewer people camping at the lakes Saturday night.
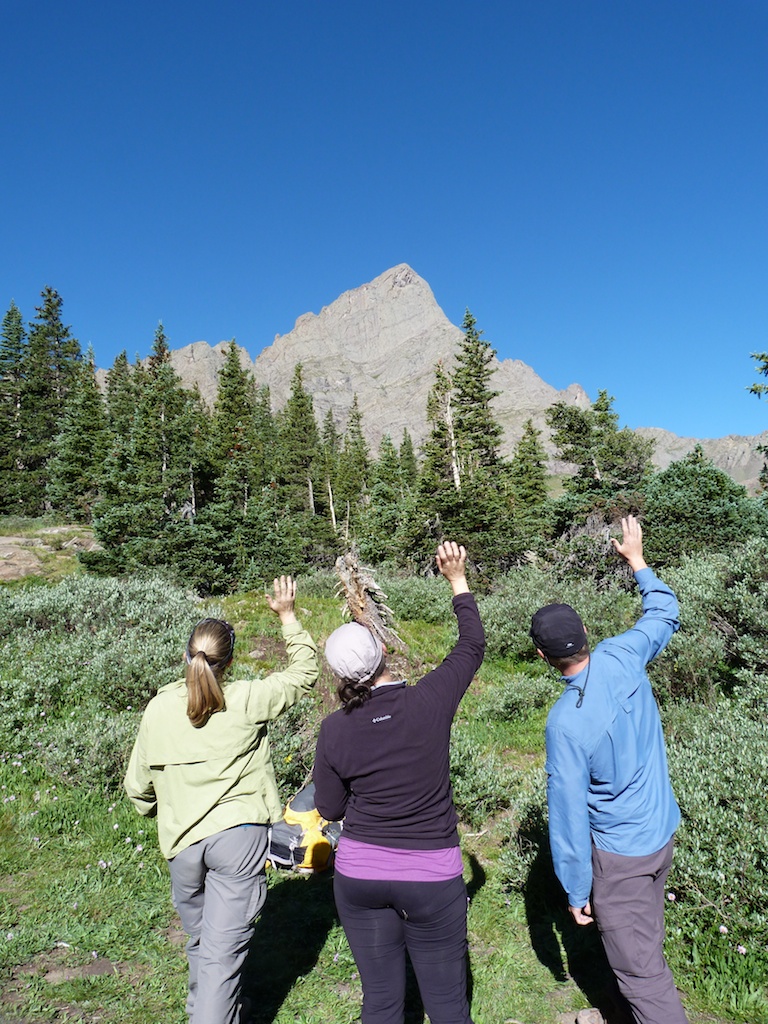
After a great nights sleep we packed up the tents. As we were packing a few big horn sheep showed up to bid us farewell. Sad that the weekend was already over we waved goodbye to Crestone Needle who had stood guard over our camp. We reluctantly shouldered our packs and forced our aching quads to make the 3.5 mile hike back to the cars.

P1040202Saying_bye_to_crestone_needleSheep_near_camp

This was just a spectacular weekend. It is impossible to even come close to capturing the beauty and grandeur and beauty of this area. I look forward to one day returning to tackle the harder peaks in the group.

Backpacking / Hiking Food

These are some ideas for trail food you can take with you backpacking or on day hikes.

General Tips

If you are out for more than a day hike you need to really consider weight, and perishability of your food.  This means dehydrated / freeze dried food rules. You will be expending a lot of calories so you want to eat high calorie foods. You know, the stuff you are supposed to stay away from at home.

Eat a very big breakfast the day you leave and plan for a big dinner on the way home.  This reduces what you carry

Pre portion your food use a combination of drysacks / plastic grocery bags / ziplock bags to portion your food. Splitting into a grocery bag for each day makes it easy to find your food, and keeps you from accidentally overeating early in the trip.

Don’t forget to hang your food & trash in a bear bag or bear canister.

Packets of olive oil or canola oil  are a good way to add healthy calories to lunches or dinners.

You should focus on getting plenty of carbohydrates, they are the primary source of quick fuel.  They will also help tired muscles replenish glycogen for the next day’s hiking.   Fat is a good way to up the overall calories, eating fat before bed can help you stay warm at night.

Breakfast

In winter or shoulder seasons a warm breakfast is a good start to a day in the outdoors, it may be worth the time and effort to heat breakfast.


  • Cliff Bars or granola bars make a great easy breakfast 
  • Bagel with cream cheese (set it on top of kettle while making coffee to get it warm)
  • Instant Oatmeal (consider nuts, raisons / dried fruit to improve) [Also bring ziplock bag to line bowl with, then you can just throw away when done)
  • Cereal with dehydrated milk
  • Pancakes
  • Dehydrated breakfast meals from Mountain House or Backpackers Pantry
  • Pop Tarts
  • Honey Stinger Waffles
  • Via instant coffee from star-bucks makes a great tasting cup of coffee in the morning. It is already pre-packaged in convenient single serving packs

Lunch
A common lunch strategy is to simply graze on snacks all day long. This avoids the time and effort of unpacking and preparing lunch. I personally prefer an actual lunch, but I try to make it low fuss.  

  • Summer sausage and hard cheese (this will keep for a couple of days)  Good with crackers
  • Flatout wrap or tortilla with – (hummus, turkey, cucumber, tomato, cheese)
  • Flatout wrap or tortilla with – chicken, avocado and smoked salmon cream cheese
  • Flatout wrap or tortilla with–  peanut butter and dried apples and a sprinkle of roasted pumpkin seeds (the green kind without the shell aka pepitas), some honey
  • Flatout wrap or tortilla spread with Gnutella & then toss in some banana chips as a wrap
  • Hot soup in a thermos (this is a real treat on a cold day)
  • Cold Pizza (only good for a short day hike)
  • PB&J on Pita bread (better than regular bread because it won’t  squish.  A good tip is to put your PB&J in a ziplock bag. You can then just cut the corner an squeeze onto your bread when you are ready to eat.
  • PB&J bagel
  • Savory bagel (onion / everything) with cucumbers tomatoes, and savory cream cheese
  • whole grain bagel with thinly sliced apple and gouda cheese.
  • Cold KFC (only good for a short day hike
  •  Lunchable – only good for day hike
  • A pouch of tuna with crackers
  • Mini-baguette sliced in half, drizzled in olive oil, plus sea salt, ground pepper and rosemary
  • Sea Bear Smoked Salmon with crackers or chibata bread.
  • Mountain house chicken salad (just add cold water) with a tortialla or bagel.

Snacks

It is always good to have a mix of salty and sweet snacks.  After a few days of trail mix, and candy sweet food starts to sound pretty disgusting.  A good variety of flavors making sure you include some savory options can help avoid this.

  • Bananas / coconut milk are a great pre hike snack.  They will give you calories and electrolytes.
  • Trail mix (there are tons of varieties in trail mix, it is a great choice because it is low weight high calorie and easy to eat)
  • Nuts (there are lots of nut mixes that can vary the flavor and range from salty to sweet to spicy)
  • Coconut Almonds and dried pineapple (yeah its just trail mix but yum!!)
  • Nut butters (justins nut butter or pocket fuel)  [Note these don’t do well in cold weather]
  • Cheetos (these do much better in a pack than potato chips)
  • Pringles (the can keeps them in good shape) (note they do sell short cans of these)
  • Crackers (Tougher crackers such as triskets or wheat things survive better in the pack)
  • Fruit Rollups, fruit leathers or cliff kids
  • Dried fruit (bannana chips, dried apricots, dried mangos, dried apples)
  • Cookies (the hard varieties do better in a pack)
  • Candies such as gummy bears, orange slices, hot tamales, twizlers (these all do well in cold weather)
  • Candy bars (snickers are great frozen)
  • Jerky (I prefer the kinds that are not super chewy as they are faster to eat and don’t get stuck in the teeth as bad)
  • Apple
  • Energy bars(Cliff, Luna, Laura are all popular) [some of these turn to real hard bricks in cold weather]
  • Protein bars (these are a nice filling snack, again cold weather can turn these into a rock)
  • Energy Gells / blocks (shot blocks are the best in my opinion)
  • Stinger organic waffle. (available at REI and YUMMY especially vanilla!!)  http://shop.honeystinger.com/categories/Organic-Stinger-Waffles/
  • Cytomax / gatorade / hammer nutrition …  (I keep a week solution of this in my camel back for a constant suply of energy and electroliytes) http://www.cytosport.com/products/cytomax.&nbsp;   I prefer the powder kind because I can bring it in my pack and mix more on a multi day trip.
  • Sharkies organic fruit chews
  • Date balls- grind up dates and walnuts add cocoa and coconut
  • yogurt or chocolate covered pretzels

Dinner

For dinner you should consider dehydrated food. Many of these such as Backpackers Pantry, and Mountain house are cheep and really pretty darn good.  If you want to reduce the sodium and the cost you could consider buying a deyhdrator and doing it your self.

Some other choices for dinner

  • Instant mashed potatoes
  • Ramen noodles
  • Cup o soup
  • MRE’s (available at military surplus stores and online)
  • Fresh caught fish.
Img_0473

Thanks to the users at 14ers.com who provided some of these ideas.